Blog
Exterior Blackout Screens: The Ultimate Homeowner's Guide
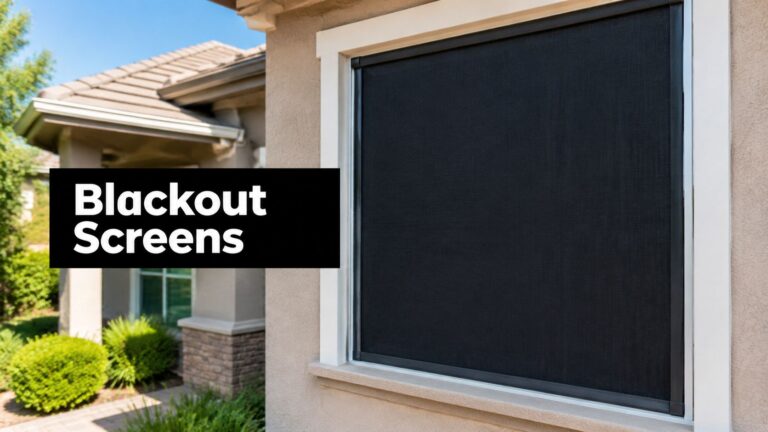
Most advice about exterior blackout screens gets one critical detail wrong. Homeowners hear "put a dark screen on the outside and the room will run cooler," then they end up with a window covering that blocks glare well enough but still leaves the glass baking.
In Phoenix, that mistake matters. A screen can help, but only when the material, frame, and installation method work together. If the installer mounts the screen tight to the glass, the setup can trap heat where you least want it.
That's a big reason this category keeps growing. The global market for external blinds and shading reached about USD 11.15 billion in 2024 and is projected to nearly double over the next decade, driven by demand for thermal comfort and solar heat reduction. People want less glare, more privacy, and lower cooling strain. The demand is real. The problem is that many installs still miss the physics.
Why Your Screens Might Be Making Your House Hotter
A dark exterior screen isn't automatically a cooling upgrade. If it's installed flush against the window, the screen can act more like a hot outer layer than a proper heat-rejection system. Homeowners often assume the fabric does all the work. In practice, mounting method matters just as much as the mesh.
Flush mount is the common mistake
A lot of exterior screen setups look clean from the curb because the material sits right against the glass or nearly touches it. That may improve privacy and darken the room, but it doesn't give heat a place to escape.
When sun hits the outside of the screen, the screen and the air behind it warm up. If there's no space between the screen and the glass, that heat stays pinned to the window assembly. Instead of shedding heat outward, the setup can keep the glass hotter for longer.
That's why I tell homeowners to treat these as separate jobs:
- Light control: stopping visible light.
- Heat control: rejecting solar energy before the glass stores it.
- Privacy control: limiting what people can see in or out.
- Durability: surviving Arizona sun without sagging or failing early.
A screen can do one of those jobs well and still disappoint on the others.
What matters more than the sales pitch
Phoenix homes with hard afternoon sun, especially on west-facing windows, expose weak installations fast. Rooms feel dimmer, but they don't always feel cooler. That's usually the clue that the system was sold as a fabric choice instead of designed as a window assembly.
If you're comparing products, start with an installer's understanding of spacing, frame design, and edge sealing. Then look at fabric. If you need a baseline on common sun-control products, our sun and solar screens are a useful place to compare broad screen options before narrowing in on blackout materials.
What Exactly Are Exterior Blackout Screens
An exterior blackout screen is basically a sleep mask for your window, but mounted outside the house instead of inside the room. That description sounds simple, but it's important because many products sold as "sun screens" or "privacy screens" are not blackout screens. They reduce glare. They cut some heat. They may improve daytime privacy. But they still let visible light through.
What makes them different
True exterior blackout screens use dense knitted or woven mesh structures built for near-total light occlusion. These materials are engineered to block close to 99% to 100% of light transmission, creating a near-total darkness environment by preventing light from getting in. That's a different job from a standard solar screen. A solar screen is meant to filter sunlight. A blackout screen is meant to stop it.
Here's where homeowners usually benefit most from blackout material:
- Bedrooms for shift workers: sleeping during daylight hours is easier when the room isn't glowing around the window.
- Media rooms: a true darkened space reduces washout on screens.
- Privacy-sensitive rooms: bathrooms, street-facing bedrooms, and side-yard windows often need more than glare reduction.
- Outdoor enclosures: some patio or pergola applications need visual block and shade together.
What they do better than interior blackout curtains
Interior blackout curtains can darken a room, but they stop light and heat after the glass has already taken the hit. Exterior blackout screens work outside the building envelope, so they address the problem earlier.
That doesn't mean every exterior blackout screen is the right answer for every window. Some homeowners need a solar screen instead because they want more daylight and outward visibility. Others need a sealed blackout setup because darkness matters more than view. A good installer should ask what bothers you most. Heat, glare, sleep disruption, privacy, or fading. Those answers usually determine the screen type faster than color samples do.
Blackout vs Solar vs Bug Screens: A Clear Comparison
These three products get mixed together constantly. They shouldn't. A standard bug screen is for insects and airflow. A solar screen is for filtering sun. A blackout screen is for darkness and stronger privacy. You can get overlap, but if you buy the wrong category, the result will feel off every day you use it.
Screen type comparison
| Feature | Exterior Blackout Screen | Exterior Solar Screen | Standard Bug Screen |
|---|---|---|---|
| Light blocking | Built for near-total darkness when the system is properly designed | Allows visible light through | Allows visible light through |
| Heat behavior | Can reduce heat load when specified and installed correctly | Standard exterior solar screens block roughly 90% of solar heat | Minimal heat-control value |
| UV protection | Product-specific. Some specialized blackout materials also offer strong UV control | Specialized outdoor-mounted meshes or films can reject a large share of solar energy at the glass and provide strong UV protection | Not the main purpose |
| Privacy in daytime | Strong | Good to strong, depending on openness and lighting | Limited |
| Privacy at night | Better than other screen types, but room lighting and edge gaps still matter | Weaker once interior lights are on | Weak |
| Airflow | Usually lower because the weave is denser | Moderate | Best airflow of the three |
| Primary use | Darkness, privacy, glare control | Heat reduction, glare control, daytime privacy | Insect control |
Which screen fits which room
If a customer says, "I want the room cooler but I still want daylight," that's usually a solar-screen conversation. If they say, "I need this room dark enough to sleep at noon," that's a blackout conversation. If they say, "I just need to open the window without bugs getting in," they need a bug screen and shouldn't pay for more screen than the job requires.
A lot of patio projects sit in the middle. People want shade, privacy, and a better-looking outdoor living area. In those cases, broader shade planning matters too, so it helps to think about pergolas, covers, and yard-side shade alongside the screen work.
Don't confuse dark fabric with blackout performance
Some solar screens are dark and look nearly opaque from a distance. They still aren't true blackout materials. They filter. They don't fully occlude. If your main concern is cooling and glare, compare solar products first. If your main concern is darkness and privacy, compare blackout products first.
The biggest buying mistake isn't choosing a bad product. It's choosing the right product for the wrong goal.
Understanding Screen Materials and Mesh Weave
Material quality decides how a screen behaves after the first stretch of brutal summer, not just on installation day. Homeowners often shop by color first. Installers know better. The weave density, coating, stiffness, and edge behavior are what determine whether the screen stays stable, blocks light consistently, and fits the frame without curling or leaking.
Why the weave changes everything
A denser weave usually means better light blocking and stronger privacy. The trade-off is reduced airflow and, in some products, less outward visibility. That isn't a defect. It's the cost of asking one material to stop more light.
Some blackout products use knitted structures. Others use woven constructions with coatings or layered finishes. In the field, what matters most is whether the material stays dimensionally stable in heat and whether the frame system keeps it tensioned correctly. Look closely at these practical details:
- Edge stability: Loose or flexible edges can wave, fray, or pull light around the perimeter.
- Surface finish: Some coatings clean easier than others and resist dust pickup better.
- Tension response: A screen that goes slack in heat won't perform or look as good.
- Visibility trade-off: The darker and tighter the screen, the less open the view usually feels.
The blackout label doesn't guarantee total darkness
Homeowner frustration often begins with ordering "blackout" material, installing it, then wondering why the room still shows thin lines of light around the frame. Even "blackout" fabrics can leak light around unsealed edges, and true 100% blockage often requires custom sealed edge systems. That matches what installers see in real homes. The fabric may block the center of the opening extremely well, while the perimeter still leaks enough light to matter in a bedroom.
If you need darkness for sleep, evaluate the edge condition before the fabric sample. The sample only tells you what happens in the middle.
What works better in practice
For windows where darkness really matters, better systems usually include some combination of:
- Headboxes or top housings: these help reduce the top light line.
- Side channels: these control edge leakage and guide the material.
- A proper bottom stop: this limits the bright strip that shows near the sill.
- Custom sizing: off-the-shelf fit is where many blackout jobs fail.
A homeowner who only wants daytime privacy can often live with small edge gaps. A shift worker trying to sleep at noon usually can't.
Installation: The Critical Air Gap You Cannot Ignore
The material gets the attention. The air gap does the thermal work. If an exterior blackout screen sits off the glass with the right spacing, the assembly gives heat a place to dissipate before that heat loads the window. If the same screen is mounted flush, the setup can hold hot air where it keeps warming the glass.
Why spacing changes performance
Field studies of exterior shading have found that exterior shading achieves its maximum cooling energy reduction, on the order of 25% to 52%, when it's mounted with an air gap off the glass, allowing heat to radiate away. Flush-mounted screens can trap heat and negate much of that thermal benefit.
That point gets overlooked constantly in hot climates. Homeowners see "outside mounted" and assume that's enough. It isn't. Exterior placement helps, but exterior placement with stand-off spacing is what allows the system to reject heat instead of storing it against the window.
What a proper install usually includes
On a well-planned installation, the screen frame or mounting hardware creates separation between the mesh and the glass. The goal isn't a giant cavity. It's enough room for air movement and heat release. I'd look for these signs in any bid or install plan:
- Clear stand-off detail: the proposal should show that the screen won't sit tight against the pane.
- Hardware matched to window conditions: stucco, trim depth, and sill projection affect bracket choice.
- Frame rigidity: a floppy frame can drift inward and reduce the intended gap.
- Allowance for operation: roll-down units need room to travel without rubbing the glass.
If the installer can't explain how the gap is maintained from top to bottom, the thermal side of the job probably hasn't been thought through.
Why DIY often misses this point
Many DIY kits are designed around easy attachment, not optimal thermal performance. Homeowners naturally choose the cleanest, flattest, simplest mount. That often means attaching the screen close to the opening with minimal projection. For privacy, that can be fine. For cooling, that's where trouble starts. The screen may still darken the room and reduce glare, so the install feels successful at first. Then the west-facing room stays stubbornly warm in late afternoon, and nobody understands why.
A blackout screen installed wrong can still look finished. It just won't perform like you expected.
When professional installation earns its keep
A good installer isn't only there to drill straight holes. They solve for spacing, edge conditions, hardware durability, and how the screen behaves on your specific elevation. That matters more in Phoenix than in mild climates because the penalty for bad heat management shows up quickly. Windows with full afternoon exposure, shallow trim, arched tops, and tight HOA appearance requirements all complicate how you preserve the gap without making the install look awkward.
Before approving any blackout screen job, ask one direct question: how are you keeping the material off the glass? If the answer is vague, keep shopping.
Budgeting for Your Screens: Cost, Maintenance, and Lifespan
Exterior blackout screens cost more than ordinary bug screens because the job usually involves heavier material, stronger hardware, more exact sizing, and tighter installation tolerances. Prices vary too much by window size, frame type, mounting method, whether the system is fixed or retractable, and how much custom edge sealing the opening needs to quote a single honest number here. A simple street-facing bedroom window is one thing. A bank of large west-facing windows with custom channels is another.
What actually drives the price
The estimate usually moves up or down based on a short list of factors:
- Window size and shape: oversized or unusual openings take more labor and custom cutting.
- Mounting complexity: stucco, recessed windows, and limited trim depth complicate installation.
- Screen system type: fixed panels, roller systems, and sealed side-channel setups don't cost the same.
- Material performance: denser blackout materials and better outdoor hardware raise the investment.
- Access difficulty: second-story and hard-to-reach windows add labor.
A solid quote should separate material choice from installation approach. If the quote is just one line item with no explanation, it's hard to tell whether you're paying for a proper system or just dark fabric in a frame.
Maintenance is simple if you stay gentle
Most homeowners overcomplicate screen care. These products usually do better with light, regular cleaning than aggressive scrubbing. Use a soft brush, low-pressure rinse where appropriate, or a mild wipe-down for dust and pollen. Avoid harsh chemicals, stiff brushes, and pressure washing close to the mesh. Those methods can damage coatings, pull fibers, or loosen edge tension. Screens help most when they're part of a bigger heat-management approach for the home.
Think in terms of value, not just ticket price
The cheapest bid often skips the details that matter most later. Better fit, better hardware, and smarter installation usually mean fewer headaches with sagging, edge light leaks, rattling, or disappointing thermal performance. That doesn't mean you need the most expensive option. It means you should pay for the parts of the job that affect daily comfort.
Hiring a Phoenix Screen Expert: A Checklist and Our Promise
Phoenix isn't forgiving. Sun exposure, dust, and long cooling seasons expose weak screen work quickly. That makes installer selection more important than many homeowners expect. A good screen contractor should be able to talk about product type, fit, and heat behavior in plain language. If they only talk about color options and how dark the mesh looks from the street, that's not enough.
The hiring checklist
Use this when you're comparing bids:
- Ask about the air gap: If they don't bring up stand-off spacing from the glass, ask directly.
- Check local experience: Phoenix-area installs deal with stronger solar load than many markets.
- Look at real project photos: You want to see finished edges, frame alignment, and clean hardware.
- Ask how they handle light leaks: Bedrooms and media rooms need a different approach than patio shade panels.
- Confirm repair support: Mesh, spline, rollers, sliders, and hardware eventually need service.
- Get clarity on lead time: Custom work is worth waiting for, but you still want a realistic schedule.
- Verify insurance and business legitimacy: Basic, but essential.
What separates a careful installer
The best installers don't treat every opening the same. They look at orientation, trim depth, room use, and whether the customer cares more about darkness, heat rejection, privacy, or airflow. Then they build around that priority.
If the contractor never asks how you use the room, they probably aren't designing the right screen for it.
That's especially true for bedrooms in hot, high-sun exposures. A west-facing nursery, a shift-worker bedroom, and a patio slider need three different conversations even if the homeowner starts with the same request. Choose the contractor who explains trade-offs clearly. You want someone who will tell you when blackout is the wrong product, when solar is the better choice, and when a sealed system is the only way to get the darkness you want.
If you want exterior blackout screens, sun screens, bug screen repair, slider rescreening, or screened patio work done by a local team that understands Phoenix heat, contact Northwind Screen Co.. We offer quick quotes, same-week service, and same-day pickup for many screen needs, so you can solve glare, privacy, and heat problems without waiting around. Text or call 555-555-0100 to get started.
Thinking about a porch or patio rescreen?
Get a quick quote on custom screens, sun and solar screens, slider repairs, and patio rescreening. Same-week service and a lifetime guarantee.