Blog
Screen Door Handle Replacement: A DIYer's Step-by-Step Guide
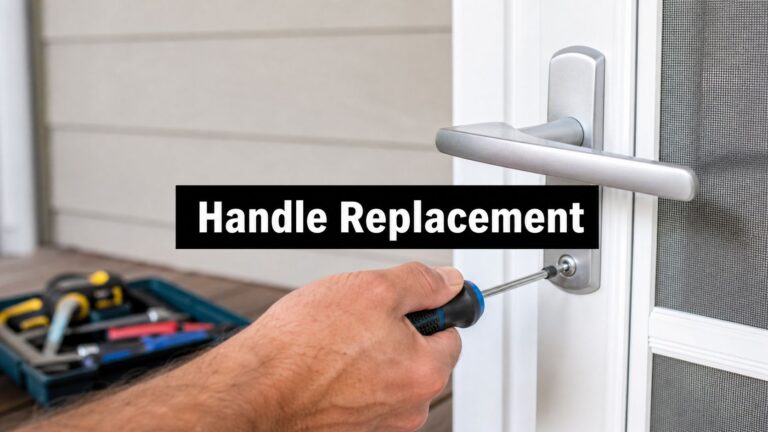
You're usually standing there with one hand on the frame and the other on a handle that suddenly feels wrong. It sticks. It flops. It won't spring back. Or the latch only works if you lift the door, lean your shoulder into it, and try again.
That's why screen door handle replacement frustrates people more than it should. The handle looks like the obvious problem, so most homeowners buy the first replacement kit that looks close enough. Then the new part doesn't fit, the latch still drags, or the door works for two days and starts acting up again.
A good repair starts with diagnosis, not shopping. On screen doors, two problems get missed all the time. One is buying the wrong mounting style, especially when the old handle uses friction tabs instead of screws. The other is blaming the handle when the actual problem is door alignment, roller wear, or a frame that has shifted out of square. If you catch those before you pull the old hardware, the whole job gets simpler.
Is Your Screen Door Handle Really Broken?
You press the handle, feel resistance, and the first instinct is to blame the hardware. In the field, that guess is wrong more often than homeowners expect.
A screen door handle usually fails in predictable ways. The trick is separating a worn handle from a door that has shifted enough to make a good handle feel bad. That second problem shows up all the time in hot, sun-heavy climates like Arizona, where frame movement and roller wear can change how the latch meets the strike.
What failure looks like
A handle that needs replacement usually gives you one or more of these signs:
- Loose movement where the lever, pull, or inside latch wobbles more than it should.
- Weak or missing return action when the handle does not spring back cleanly.
- Visible damage such as cracks, bent parts, or wallowed-out mounting points.
- Rough latch action with the door open, where the mechanism still grinds or sticks even without frame pressure.
That last point saves people a lot of wasted time. If the latch feels smooth with the door open but drags once the door is shut, the handle may be fine.
What gets misdiagnosed
I see two missed causes over and over. The first is a mounting mismatch. Some screen doors use friction-tab handle sets, while others use screw-through hardware. A door can end up with a loose, awkward, half-working handle because someone forced the wrong style onto the frame. The handle looks bad, but the underlying problem started with the mounting method.
The second is alignment. On sliding doors, worn rollers or a dirty track can drop the latch just enough to make it scrape. On hinged doors, sagging hinges or a frame that has moved out of square create the same symptom. The handle becomes the part you feel, but not the part causing the resistance.
A quick check before you remove anything
Run these checks first:
- Work the handle with the door open. It should retract and return without binding.
- Close the door slowly and watch the latch meet the strike. If it rides high, hits low, or scrapes the edge, the door is out of alignment.
- Lift or wiggle the door gently. Extra play usually points to roller wear, hinge sag, or frame movement instead of handle failure.
This takes about a minute. That minute can save you from buying the wrong part, especially when the actual repair is adjustment, not replacement.
Gathering Your Supplies and the Correct Handle
A bad handle purchase wastes more time than the actual repair. I see it all the time in Arizona. A homeowner brings home a handle that looks close, gets halfway through the job, then finds out the old set used friction tabs and the new one needs screw holes, or the latch still drags because the frame has shifted from heat and sun exposure. The handle gets blamed, but the part was never the whole story.
Before buying anything, match the hardware to the door you have, not the one you wish it had. Sliding screen doors, hinged screen doors, and light storm doors can look similar from five feet away and mount completely differently once you get a screwdriver on them.
What to have on hand
Keep the tool list simple, but make it specific.
| Item | Type/Size | Purpose |
|---|---|---|
| Phillips screwdriver | Medium | Removes and installs the screws used on many handle sets |
| Hex wrench or Allen key | Common small sizes | Loosens hidden set screws under caps or trim pieces |
| Tape measure | Small hand tape | Measures hole spacing, backset, and overall handle footprint |
| Penetrating oil | Small amount | Frees rusted or painted-over screws |
| Replacement handle kit | Correct mounting type and spacing | Matches the existing door hardware |
| Container for screws | Small cup or tray | Keeps small parts from disappearing |
If the door is older, add a flat screwdriver or putty knife for gently lifting trim caps. I also keep a phone handy to photograph the old handle before it comes apart. That one habit saves a lot of guesswork at the hardware counter.
Measure before you shop
This part matters more than finish color or brand name. Check four things before ordering:
- Mounting type. Friction-tab and screw-through handles are not interchangeable without modification, and modification usually leaves a loose fit.
- Hole spacing. Measure from the center of one mounting hole to the center of the other.
- Backset. Measure from the edge of the door frame to the center of the mounting point.
- Latch style. Match locking to locking, non-locking to non-locking, and make sure the latch shape matches the strike.
Do not buy by photo match alone. Buy by mounting style, spacing, and latch compatibility.
Two mistakes that waste the most time
The first is trusting the word "universal." In screen door hardware, that usually means the kit fits several common sizes, not every door on the rack. If the mounting method is wrong, the install goes bad fast.
The second is skipping a frame check while shopping for parts. In hot, sun-heavy climates, I regularly find doors that have dropped slightly or frames that have racked out of square. A fresh handle on a misaligned door still feels sticky, still scrapes, and still gets forced harder than it should.
One more tip from the field. Keep the old handle until the new one is fully installed and tested. Small parts such as spacers, strike shims, and odd screws are easy to overlook, and some replacement kits do not include a perfect substitute.
Step by Step: Sliding Door Handle Replacement
Sliding screen door handles are usually straightforward once you confirm the door is the problem and the replacement kit matches the old setup. If your sliding screen still drags, rattles, or jumps in the track, it helps to look at broader slider screen repair issues before you button everything up.
Remove the old handle carefully
Start with the door closed so the frame supports it. Remove the visible mounting screws while keeping one hand on the outside pull. That last part matters. Supporting the exterior handle during removal prevents it from falling, twisting, or nicking the frame.
Take the old handle set apart slowly. If the screws are stubborn, apply penetrating oil and give it a few minutes before trying again. If there's a hidden set screw, loosen it with the correct hex wrench instead of prying.
Inspect the latch before installing the new parts
Once the old hardware is off, look at the latch body and the opening in the door stile. Dirt, burrs, and bent internal parts can make a new handle feel bad right away. Check for:
- A bent latch hook or tongue.
- Packed debris inside the cavity.
- Signs of rubbing around the spindle opening.
- Cracked mounting areas on thin aluminum frame sections.
If the internal latch is damaged, replacing only the pull handles won't solve much.
Fit the new handle set
Line up the new inside and outside parts loosely first. Don't fully tighten anything until the spindle and latch are engaged correctly. Proper installation usually calls for precise spindle alignment with the latch mechanism, and running about 10 full retraction cycles with light handle pressure before final tightening catches the large majority of alignment issues. That testing step is where most DIY jobs either succeed or go sideways. Here's the order that works best:
- Set the outside pull in place and hold it steady.
- Insert or align the spindle so it engages the latch cleanly.
- Position the inside handle without forcing screw holes into alignment.
- Start both screws by hand so the threads catch evenly.
- Tighten gradually from side to side until the handle is secure but not pinched.
Test before you call it done
Operate the handle with the door open first. You want a full latch retraction with light pressure and an immediate spring-back. Then test the door closed several times. Listen to the latch. A clean, light engagement tells you the handle and strike are cooperating. Resistance means something is still off.
If the screws only line up when you force the handles together, stop there. That's usually a mismatch in spacing, spindle engagement, or latch style.
Installing a New Hinged Door Handle
A hinged screen door can fool you. The handle feels like the bad part, but plenty of replacements fail because the new set does not match the way the old one mounts, or because the door has shifted just enough that the latch is fighting the frame on every close.
On hinged doors, I check two things before I even pick up the new handle. First, confirm whether the old set uses through-screws or friction tabs. Those systems do not interchange cleanly. Second, look at the reveal around the door and the strike side. In hot, sun-heavy climates, a slightly twisted frame can make a brand-new handle feel defective.
Confirm the handle style before you assemble anything
Hinged screen and storm door handles have more going on than a sliding pull. You usually have an outside grip, an inside latch body, and a spindle or actuator that has to meet the latch squarely. Set the old and new parts on the ground in the same orientation. Compare the spindle shape, latch nose, handedness, and how the trim fastens to the door. If the new inside plate only lines up when you force it, stop and recheck the mounting style. That is a common mismatch, and it wastes a lot of time.
I also check the door itself at this stage. If the latch side is rubbing, or the gap at the top corner is tighter than the rest, the handle may have been blamed for a frame problem.
Install in an order that keeps the spindle aligned
Use a steady sequence:
- Support the outside handle as you remove the old fasteners so it does not twist and chip the door skin.
- Remove the old inside latch body and spindle carefully, then keep the parts laid out in removal order.
- Fit the outside handle first if the spindle projects through the door.
- Bring the inside latch assembly into place only after the spindle is centered in its receiver.
- Start every screw by hand and leave them slightly loose until the latch cycles freely.
- Tighten a little at a time, alternating sides so the trim stays flat.
A good handle should work with light hand pressure. If it takes a hard squeeze, something is out of position.
Small installation mistakes cause most call-backs
The usual problem is not a dramatic failure. It is a small bind that gets worse once the door is shut. Common examples include a spindle set in the wrong slot for the door thickness, a reversible latch body installed backward, or screws tightened so much that the inside and outside plates pinch the mechanism. I see that last one often on thinner aluminum doors. Match the hardware first, then check whether the door is closing in line with the latch. Finish with three checks:
- Open the door and work the handle several times while watching the latch retract and return.
- Close the door gently and confirm the latch meets the strike without scraping or bouncing back.
- Test any lock or night latch from the inside to make sure it engages and releases in the correct direction.
If those tests pass, the install is sound. If the handle works open but acts up when the door is closed, the next problem to examine is usually alignment, not the new handle.
Troubleshooting When the New Handle Still Sticks
A sticky new handle usually means the handle was never the full problem. I see this after DIY replacements all the time, especially on older sliding screen doors in hot climates. The new parts fit, the screws line up, but the latch still drags because the door frame has shifted, the rollers are low, or the replacement handle uses a different mounting setup than the original.
Match the symptom to the cause
Watch what the door does, not just what the handle feels like.
- Handle feels stiff as soon as you tighten it down. The plates may be clamping the mechanism, or the spindle is not sitting correctly in the latch body.
- Latch misses or scrapes the strike plate. The door is landing out of line, even if the handle itself is fine.
- Door only latches when lifted, pushed, or pulled inward. That usually points to worn rollers, sag, or frame movement.
- Handle moves freely with the door open but sticks when closed. The latch is meeting pressure at the frame or strike, not failing inside the handle.
- New handle never sat flat in the first place. Check whether you replaced a friction-tab style with a screw-mount style, or the reverse. A mismatch can twist the trim and bind the latch.
Check alignment before blaming the new hardware
Sun-exposed doors, especially in places like Arizona, often change shape just enough to create latch trouble. The frame may rack slightly, the top gap may widen on one side, or the latch may start hitting the strike pocket off-center. That kind of misalignment makes a brand-new handle feel defective.
A quick field test helps. Open the door and work the handle. Then close it slowly and watch the latch meet the strike. If the action is smooth while open but rough only when the door is shut, stop replacing parts and inspect the door path, frame gaps, and roller height.
Practical fixes before you buy more parts
- Back off the mounting screws a quarter turn and test again. Overtightening is common on thin aluminum frames.
- Check that the handle type matches the original mount. Friction-tabs and screw-through bodies do not always interchange cleanly.
- Shift the strike plate slightly so the latch enters without rubbing.
- Look for rub marks on the frame, latch, and door edge. They show exactly where the bind is happening.
- Use a dry silicone lubricant on the latch only. Avoid heavy oil because it collects grit in screen door hardware.
- Adjust the rollers if the door has dropped. Even a small height change can bring the latch back into line.
When the handle, strike, and rollers all check out but the door still binds, the frame itself may be out of square. At that point, it helps to find a trusted local screen repair specialist instead of forcing another hardware swap that will not solve the problem.
Know When to Call Your Local Screen Expert
A handle swap should feel straightforward. If the new hardware still will not sit right, latch cleanly, or stay aligned after basic adjustments, the problem is usually bigger than the handle.
I see this a lot on older slider and hinged screen doors in Arizona. Sun exposure dries out plastic parts, but the bigger issue is often frame movement. A door can rack slightly out of square over time, and that makes a perfectly good replacement handle feel defective. The other common miss is mounting style. Friction-tab and screw-through handles can look close enough online, then fail the moment you try to seat them in the frame.
The cost trade-off
The cost trade-off is real. A DIY handle kit can range from about $7 for a basic kit to over $200 for more complex hardware, and professional service can average around $300. That difference narrows fast if you buy the wrong hardware, crack a brittle pull, or strip out the frame while forcing a mismatch. On thin aluminum doors, one bad attempt can turn a simple replacement into a repair that also needs hole reinforcement or a new latch area.
When a pro is the smarter move
Call a screen repair specialist if the handle problem points to the door itself, not just the hardware:
- The frame is twisted or bowed, so the latch lines up in one position but misses in another.
- The replacement handle does not match the original mounting system, especially with older friction-tab styles.
- The latch pocket or strike area is chewed up, bent, or pulled loose.
- The mounting holes are stripped or wallowed out in a light aluminum frame.
- The door needs combined corrections, such as rollers, track cleanup, strike alignment, and handle fitting at the same time.
At that stage, guessing gets expensive. A good local tech can identify whether the fix is hardware, alignment, or frame correction in a few minutes.
If you'd rather skip the trial-and-error part, Northwind Screen Co. handles screen door repairs, rescreening, slider work, bug screens, sun screens, and screened patio repairs across the Phoenix area and beyond. You can text or call 555-555-0100 for a quick quote and same-week service.
Thinking about a porch or patio rescreen?
Get a quick quote on custom screens, sun and solar screens, slider repairs, and patio rescreening. Same-week service and a lifetime guarantee.