Blog
Security Screen Door Repair: Fix & Secure Your Home
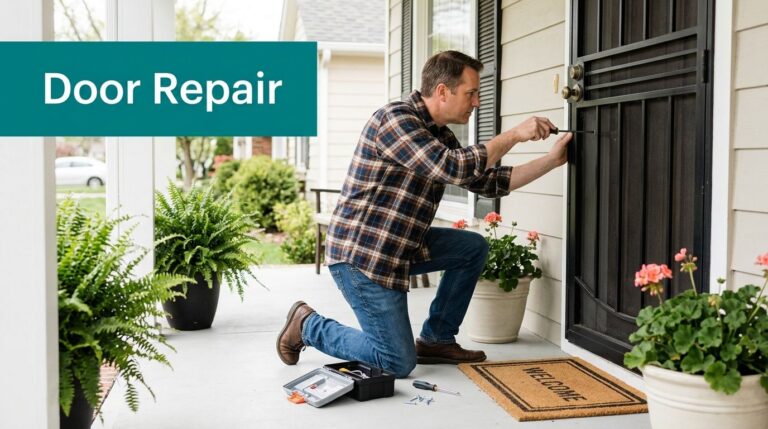
You notice the problem when the door stops feeling solid. Maybe the mesh has a tear near the handle. Maybe the latch only catches if you lift the door a little. Maybe the frame scrapes and leaves fresh marks on the threshold. This is often perceived as a screen problem.
Sometimes it is. Sometimes it isn't.
With security screen door repair, the biggest mistake is treating every issue like a cosmetic nuisance. A standard bug screen can get away with a quick patch and a shrug. A security screen door is part of the barrier between your home and the outside. If the frame is weak, the latch is loose, or corrosion has started inside the hardware, a neat-looking repair can still leave you with a door that no longer protects the way it should.
Diagnosing Your Security Screen Door Damage
When a security door starts acting up, begin with a full inspection before you buy a single part. A ripped panel is easy to see. The failure that matters most is often hiding in the frame, hinges, or latch pocket.
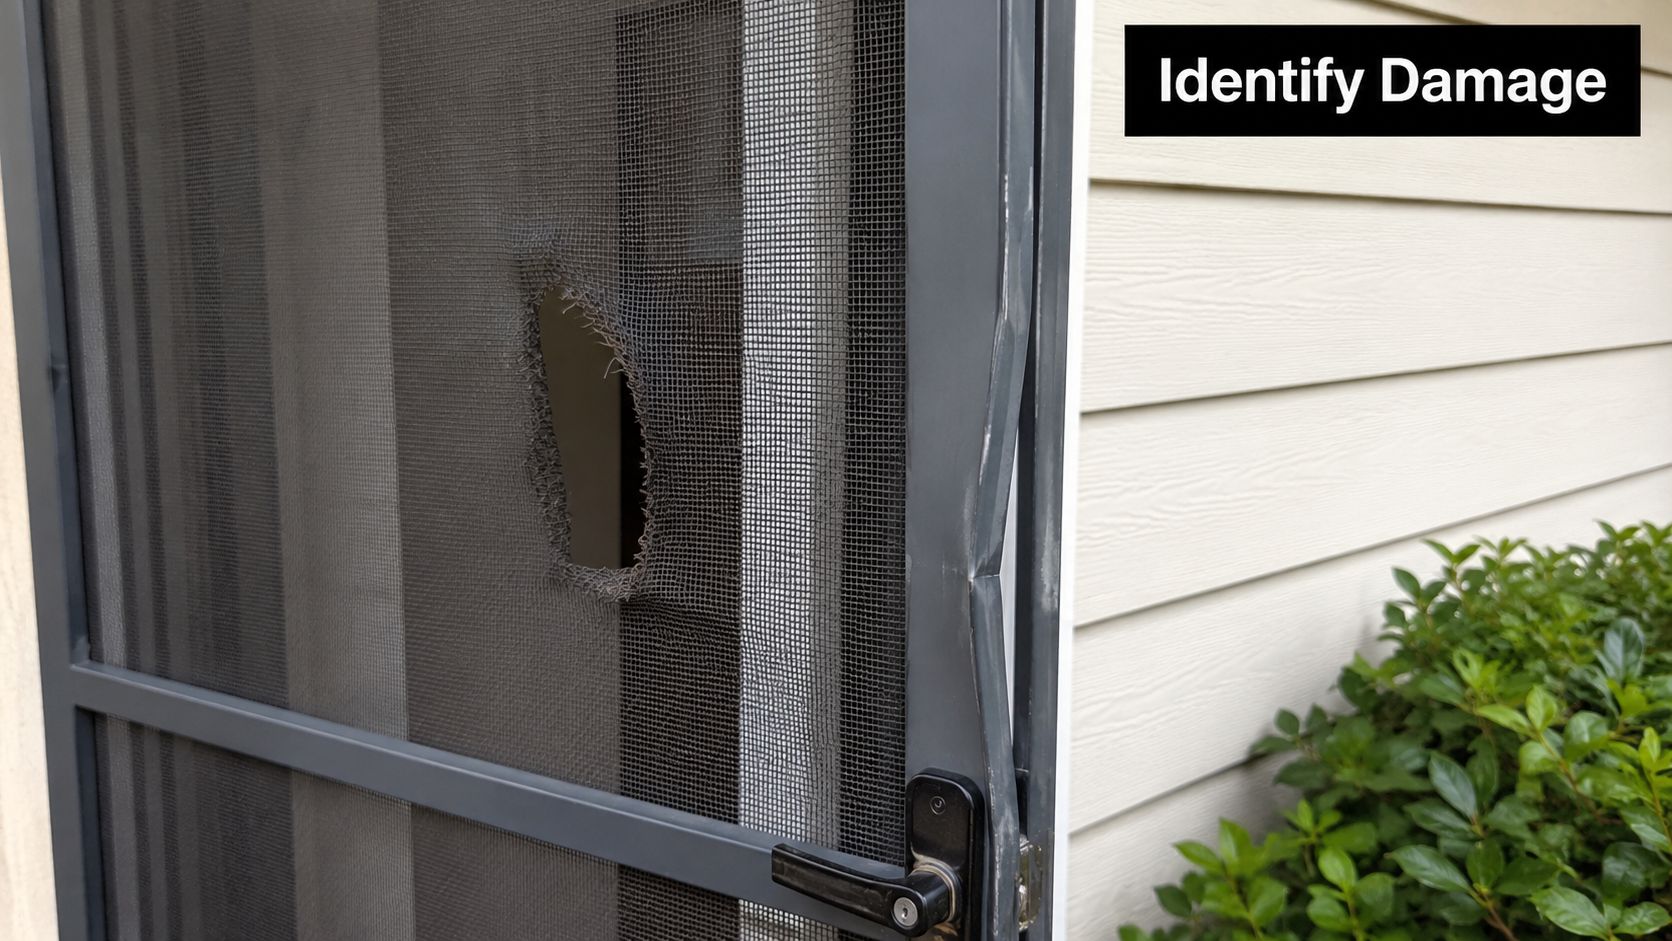
Start with what the door is telling you
Open and close it slowly. Listen. Feel for drag, wobble, and resistance. Then check these areas:
- Mesh damage: Small tears and pulled edges usually point to a screen-only repair.
- Frame shape: Look down the vertical sides. If one rail bows or twists, the problem may be structural.
- Latch behavior: A latch that misses, sticks, or needs force often means alignment has shifted.
- Hinges or rollers: Sagging doors often trace back to worn hardware, loose screws, or metal fatigue.
- Corners and spline: Loose corners let the mesh relax and pull free over time.
If you also have window screens with similar wear, this guide to common window screen damage helps you spot the difference between routine wear and a repair that needs more attention.
Look past the obvious tear
A lot of homeowners stop at the mesh because that's the part they can see. That can be a costly miss. Recent industry analysis noted that in major markets like Arizona, over 40% of security door failures in the last 12 months were tied to hidden corrosion affecting the latch or hinge, not just mesh damage according to this corrosion-focused repair discussion.
Practical rule: If the door looks rough but still locks cleanly, you may have a screen repair. If the door looks decent but the latch, hinge, or frame feels weak, treat it as a security problem first.
Check rust around screw heads, hinge leaves, lock cylinders, lower corners, and the bottom rail. Probe suspicious spots with a screwdriver tip. You're not trying to gouge the metal. You're checking whether the surface is just stained or the metal has started thinning.
Separate cosmetic problems from security risks
Use this simple filter:
| Issue | Usually cosmetic | Possible security risk |
|---|---|---|
| Torn mesh | Yes | If paired with loose frame or failed spline |
| Bent frame edge | Sometimes | Yes, if latch alignment changes |
| Loose handle | Sometimes | Yes, if lock body shifts in the cutout |
| Sticky hinge | Sometimes | Yes, if rust has spread into mounting points |
| Door dragging | No | Often points to sag, frame shift, or worn rollers |
A clean diagnosis saves time. It also keeps you from putting fresh mesh into a door that still won't close safely.
Gathering Your Repair Toolkit and Materials
Start with the repair you have, not the repair you hope it is. A torn panel calls for light hand tools and screen supplies. A loose latch, sagging frame, or dragging door can call for hardware, measuring tools, and sometimes parts you should not guess on.
That distinction matters on a security door. Fresh mesh can make a door look fixed while a weakened hinge mount or worn latch still leaves the opening easier to force. Good prep is less about buying more tools and more about avoiding the wrong repair.
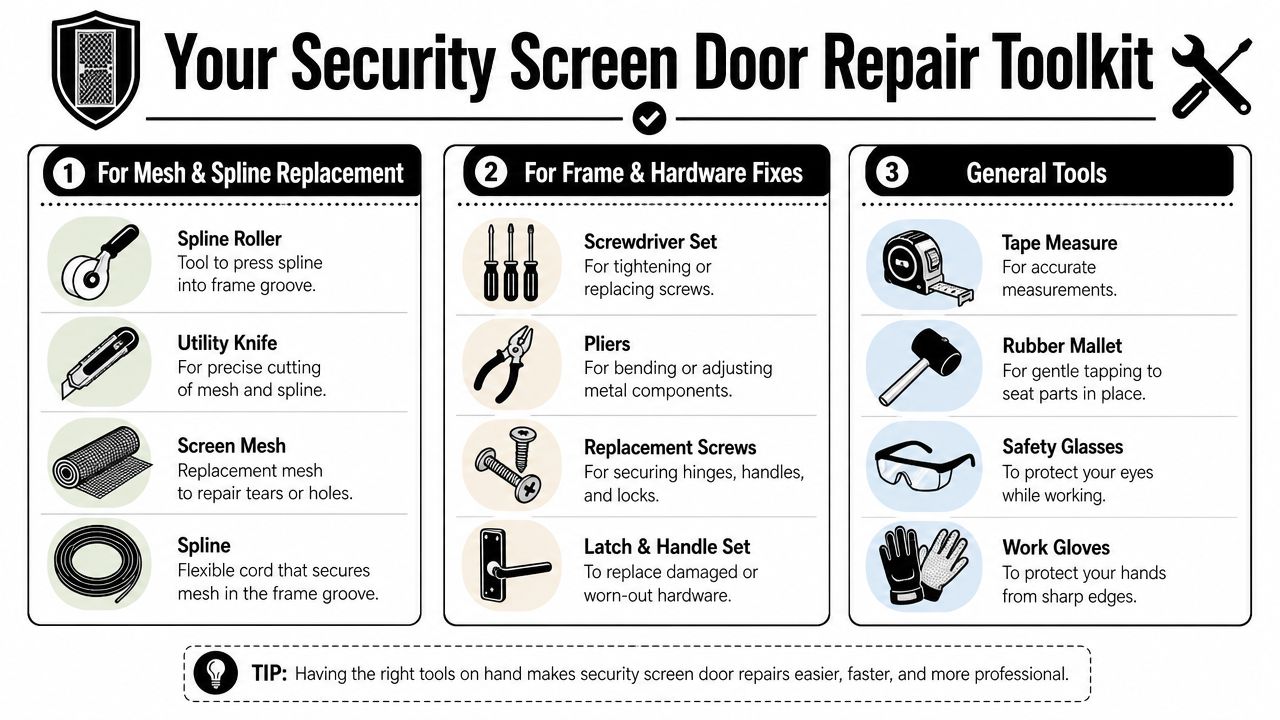
If you already know the frame is sound and the job is limited to the screen panel, keep a reference like this step-by-step guide to replacing screen door mesh open while you set up.
For mesh and spline replacement
Use this kit for straightforward rescreening work:
- Fiberglass mesh: Easier to tension evenly and a good fit for many standard screen repairs.
- Spline roller: Gives consistent pressure so the screen seats properly in the channel.
- Replacement spline: Match the old diameter and profile as closely as you can.
- Utility knife: Useful for trimming new mesh and lifting the old spline.
- Flat screwdriver or pick: Helps start spline removal without tearing up the frame groove.
A spline roller is a small purchase that makes a visible difference.
For frame and hardware fixes
Use a different setup if the door sags, rubs, shifts at the latch, or feels loose when you pull on it:
- Screwdriver set: For hinges, handles, strike plates, closers, and roller hardware.
- Pliers: Handy for clips, tabs, and minor straightening.
- Silicone lubricant: Works well on moving parts without attracting as much dirt as oily sprays.
- Replacement hinges, latch parts, or rollers: Buy these after you verify the exact failure and size.
- Work gloves: Cut edges, burrs, and rusted fasteners can bite fast.
This is also the point where judgment matters. Tightening screws is simple. Discovering that the screw holes are wallowed out, the metal around them is thin, or the latch cutout has started to deform is different. Those are security issues, not cleanup work.
General tools worth having nearby
A few basics save time and keep the door from getting damaged during the repair:
- Tape measure: Check panel size, spline size, and hardware spacing before buying parts.
- Marker: Mark top, bottom, hinge side, and hardware orientation before removal.
- Shop brush or vacuum: Clears grit from tracks and spline grooves.
- Drop cloth or sturdy work table: Supports the door evenly so you do not twist the frame while working.
If you are building a one-time toolkit, keep it modest. Buy the hand tools that improve the repair result, then stop. Once the job involves frame distortion, lock alignment, rusted mounting points, or a door that still does not close securely after adjustment, it is usually smarter to have a pro such as Northwind Screen Co. inspect it before you spend more on parts.
A Step-by-Step Guide to Replacing Damaged Mesh
A torn panel near the latch side looks minor until you remember what a security screen door is supposed to do. Fresh mesh improves appearance and keeps insects out, but it does not restore security if the frame is bent, rust has spread into the corners, or the lock area has loosened up. Replace the mesh only after you are confident the door structure is still solid.
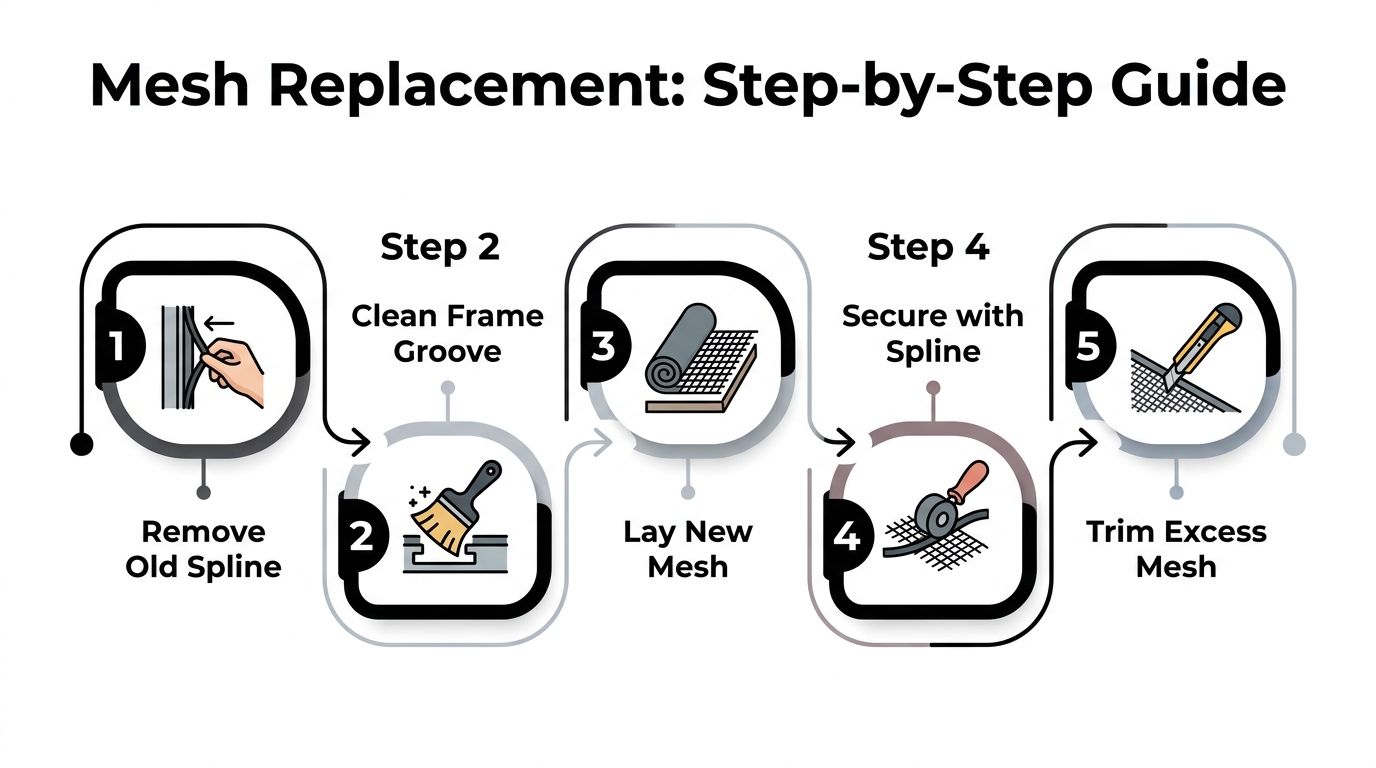
If you want a companion walkthrough while you work, this guide on how to replace screen door mesh shows the same job in a straightforward format.
Remove the door and clear the opening completely
Set the door on a flat, supported surface. If the handle or trim sits proud on the screen side, remove it so the new mesh can lie flat and you can see the spline channel clearly. Lift one end of the old spline with a small flat screwdriver or utility knife tip, then pull it out by hand.
Strip away all old screen material and clean the groove well. Dirt, brittle spline fragments, and old adhesive make the new spline harder to seat, and that usually shows up later as loose spots or corners that start lifting.
Here's a visual walkthrough that helps if you've never seen the sequence done in real time.
Position the new mesh with tension in mind
Roll out the replacement screen across the full panel and leave 2 to 3 inches extra on all sides. That extra material gives you room to pull the mesh square without distorting the weave.
A good habit is to start by seating the side edges lightly before you lock in the top and bottom. The goal is even tension across the panel, not maximum tension. Pulling too hard can bow a lighter frame or make the finished screen look rippled once the door is back in use. For a second reference on the basic rescreening sequence, this screen door repair tutorial is useful.
One shortcut causes a lot of bad results. People rush to pin one full side tight, then force the opposite side to catch up. That is how wrinkles and diagonal pull lines start.
Install the spline without twisting the frame
Press the spline into one corner first, then roll it along a side with a spline tool while keeping light hand tension on the mesh. Secure the opposite side next so the panel stays centered. After that, finish the top and bottom.
Work slowly at the corners. Corners are where loose mesh starts, and on a security screen door they deserve extra attention because a sloppy fit can hide bigger trouble. If the spline will not stay seated, do not keep forcing it. Check whether the groove is packed with debris, the spline size is wrong, or the frame edge has been bent from prior repairs.
Trim the excess mesh only after the spline is fully seated. Use a sharp blade and keep it angled away from the finished screen.
Check the result before the door goes back up
A clean rescreen job should pass a few simple checks:
- Flat appearance: The mesh should sit smooth without waves, puckers, or a pulled-off-square pattern.
- Firm corners: Press each corner lightly. The spline should stay put.
- No frame flex: If the frame twists or rocks on the work surface now, mesh replacement was not the only issue.
- Clear hardware fit: Reinstalled handles, guards, and latch trim should not pinch or rub the new screen.
If you find rust at the lower rails, cracking around fastener points, or a frame that has started to spread, stop there. New mesh will cover the problem, not fix it. That is a good point to get a professional opinion from Northwind Screen Co..
Material choice matters too. Some doors are built and tested as part of a larger security assembly, not as a simple bug screen. If you want context on how security standards differ by market, you can compare UK security gate options and see how frame strength and hardware matter alongside infill material. For doors with formal ratings, follow the manufacturer guidance and review this overview of security screen door certifications before swapping materials.
Fixing Door Frames, Locks, Hinges, and Rollers
A security screen door can have perfect mesh and still fail where it counts. Hardware problems change how the door closes, locks, and resists force. In these instances, repairs move from tidy-up work into function-first work.
When the door drags or scrapes
Start with the simplest causes. Tighten visible hinge screws on hinged doors. On sliders, inspect the track for packed debris and look at the roller adjustment points. A sagging door often drops at the latch side first, which creates scrape marks and poor closure.
Try this order:
- Clean first: Dirt in the track or hinge area can mimic a bigger failure.
- Tighten hardware: Loose fasteners let the door shift under its own weight.
- Lubricate moving parts: Use silicone lubricant sparingly.
- Adjust rollers or hinges: Make small changes and test each time.
For sliding units, a focused guide on patio door slider repair can help you sort track issues from roller issues.
When the latch doesn't catch cleanly
A latch that misses by a little is still a problem. On a security door, "almost closed" isn't closed.
Check whether the striker plate has shifted, whether the door has dropped, or whether the frame opening is slightly out of square. If the handle feels loose, remove the trim and inspect the mounting screws and lock body. Tighten what you can, then retest with slow, normal closure. Don't slam it to prove a point.
A latch that only works when you lift, shove, or pull the door into place is warning you that something else is out of line.
When the frame feels loose or bent
DIY judgment matters. A light bend near an outer edge might be correctable. A frame that has twisted at the lock side, split at a corner, or loosened around the hinge mount is a different category.
Watch for these signs:
- Visible daylight at one edge: The frame isn't sitting true.
- Movement at mounting points: Screws tighten, but the metal or surrounding material still shifts.
- Latch-side flex: The lock engages, but the door edge gives under pressure.
If you're comparing door protection approaches in a broader sense, it can help to compare UK security gate options to see how frame strength, lock setup, and barrier design affect real-world security choices. The main lesson carries over. The barrier is only as strong as its weakest mounting point.
What usually works and what usually doesn't
What works: cleaning tracks, replacing worn rollers, tightening hinges, adjusting striker plates, and replacing damaged but accessible hardware.
What usually doesn't: trying to patch rusted structural metal with filler, forcing a bent frame back into square without addressing why it moved, or replacing only the visible part of a lock when the mounting area has already weakened.
If the door closes smoothly, latches without force, and stays rigid at the edges, your repair likely restored function. If it still needs persuasion, keep diagnosing before you call it done.
DIY vs Pro Repair When to Make the Call
You finish the repair, the door swings shut, and for a moment it looks fine. Then you press near the latch side and the panel gives, the lock feels vague, or the frame shifts more than it should. That is the point where a security screen door stops being a simple DIY project and becomes a home safety question.
A good rule is simple. Handle repairs yourself when the job restores function without changing the door's strength. Bring in a pro when you are no longer sure the door will resist force, stay aligned, or keep the lock working the way it should.
Where DIY usually makes sense
DIY is usually reasonable for jobs like:
- replacing torn mesh on an otherwise solid door
- swapping worn rollers or a basic latch
- tightening accessible hardware
- adjusting a striker plate or closer
These jobs can save money if the frame is still square and the mounting points are firm. The trade-off is time. A repair that looks small can turn into an afternoon once you start chasing fit issues, stripped screws, or old parts that no longer match current hardware.
Where it stops being a DIY repair
Call for professional help if the repair affects security, not just convenience.
That includes rust that has eaten into the frame or hinge area, lock-side damage, failed welds, sagging that returns after adjustment, or any repair where the door closes but does not feel rigid. Those are the problems that fool homeowners. The door may look usable while the weak point is hiding inside the metal or around the fasteners.
Multi-point locks and reinforced security doors deserve extra caution. Replacing the visible hardware is one thing. Restoring the door so it latches cleanly and holds under pressure is another.
The real cost decision
DIY usually wins when the repair is isolated and the door is still structurally sound. Professional work usually wins when diagnosis matters more than parts.
That is the part people miss. A torn screen is obvious. A weakened latch mount or rusted corner joint is not. If you spend money on mesh, rollers, or new lock parts before confirming the frame is still sound, you can end up improving the appearance of a door that no longer offers much security.
I tell homeowners to judge the result by feel as much as looks. The door should close without forcing it, latch positively, and stay firm when you push at the edges. If it rattles, flexes, or needs a special trick to lock, the repair is unfinished.
If you are curious why service companies work hard to be found quickly for urgent jobs, this guide to driving transactional searches gives useful background. Homeowners often need help fast when the front door barrier is no longer trustworthy.
A repair is only a success if the door is secure after the work, not just prettier.
Northwind Screen Co. is a good call when you need an experienced set of eyes on a door that may have hidden structural problems, especially if you want to know whether repair still makes sense or replacement is the safer investment.
Your Phoenix Area Expert Northwind Screen Co.
A security screen door can look serviceable and still fail where it matters most. I see that with doors that have fresh mesh but loose latch mounts, rust working inside the frame, or hinges that let the slab sag just enough to keep the lock from engaging fully.
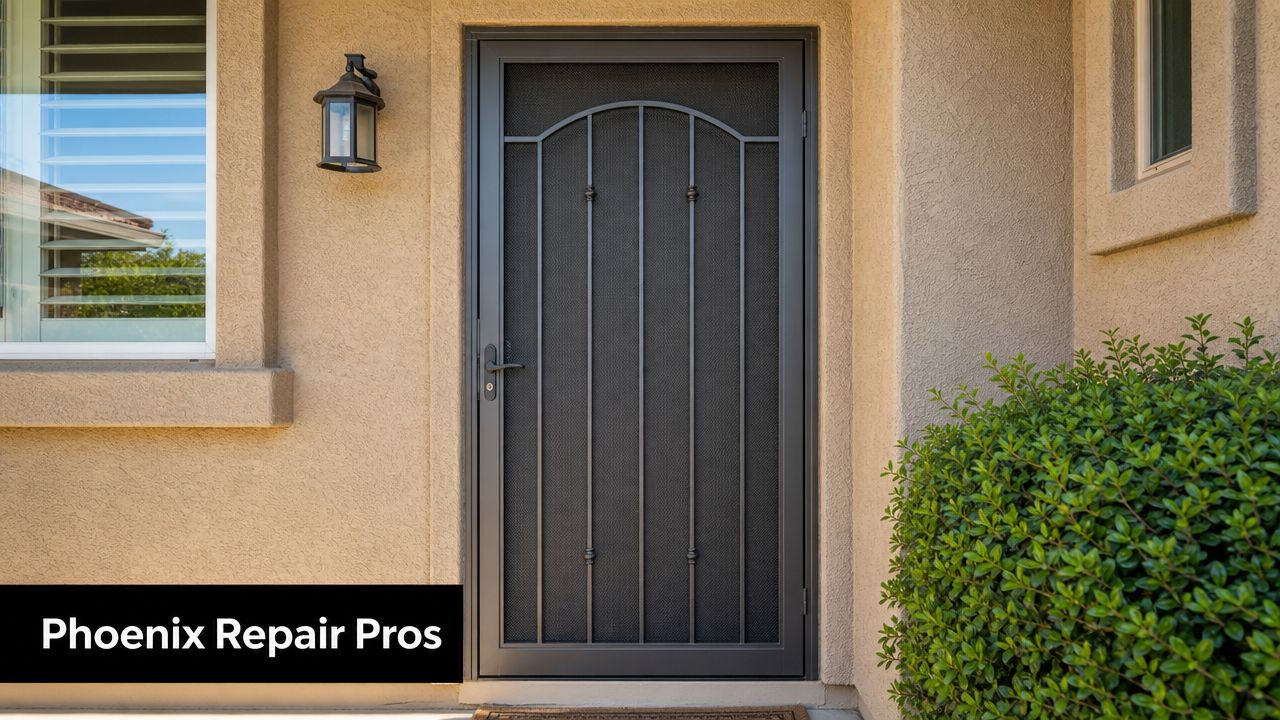
For homeowners in Phoenix and nearby communities, Northwind Screen Co. handles rescreening, new bug screens, new sun screens, slider repair, slider rescreening, screened-in patio rescreening, and related screen work with quick quotes and same-week service. That speed helps when the problem is no longer cosmetic and the door needs a proper repair before you trust it again.
Good service matters most when the job starts with diagnosis. A sticking lock might be a simple hardware issue, or it might point to frame twist, worn hinges, or corrosion around the mounting points. If the frame has softened from rust or the lock side no longer lines up under pressure, replacing parts alone does not restore security. That is the point where a careful inspection can save money and prevent a false sense of safety.
If you're also curious how local service companies improve visibility so homeowners can find help fast, this guide to driving transactional searches gives useful background on why strong local search matters for urgent home repair needs.
Text or call 555-555-0100 or 800-370-3998 to request help with security screen doors, sliders, and other screen repairs in the Phoenix area.
Thinking about a porch or patio rescreen?
Get a quick quote on custom screens, sun and solar screens, slider repairs, and patio rescreening. Same-week service and a lifetime guarantee.